Minecraft Academy

Welcome to Minecraft Academy. My goal is to provide comprehensive tutorials and articles on all subjects relating to minecraft in one centralized location, without the banter, bickering, and spamming found on the official Minecraft forums. The front page will host the newest guides, tutorials, and projects for a quick glance at updates.

New Guides


Architecture


New Projects


Architectural Guide: Modern - International Style


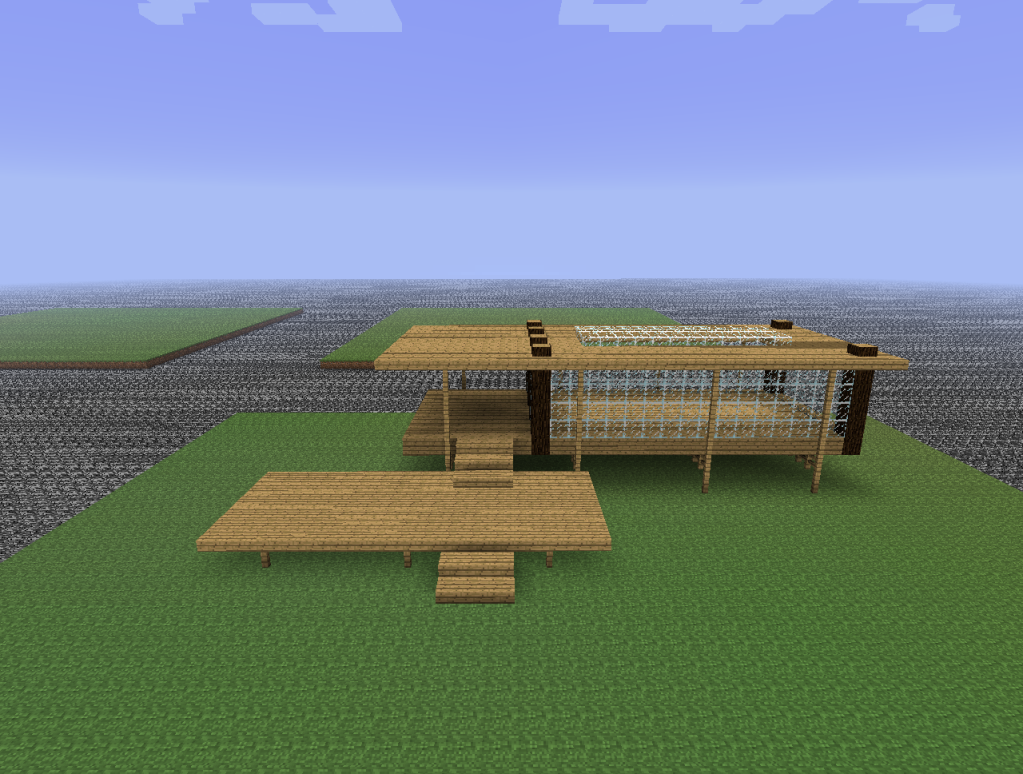
This house is inspired by the Farnsworth House by Ludwig Mies van der Rohe. While the materials are much less refined in Minecraft, the principles of International Style are perhaps easiest to see in this house than any other. Note that I am referring only to the architecture, but I might add interior design elements later.

In this example, there are a few design elements to note. The use of half-blocks where possible, on the deck and for the roof. The half blocks are slimmer, rectilinear, and cleaner than full blocks. Floor-to-Ceiling windows promote the sense of space and light. The lack of interior walls appeals to the minimalist aspect of International Style.


Overview


International Style is actually a pretty simple style to emulate, at least in principal, as most of the default textures in Minecraft are too rough to represent the refined simplicity. Floor plans should be simple, rectangular. Interior walls should only be used when absolutely necessary, think open floor plans. Large windows should be used to create bright, open spaces. Strict symmetry should probably be avoided. The materials of choice are Glass, Steel, and Concrete. If enough people are interested, I will make a Modern Style texture pack to cover these materials. Otherwise, it is more important to implement the ideas of the design than the materials.


  • Rectilinear Shapes
  • Expression of volume, open
  • Weightlessness
  • Minimalism - stripped of ornament


Step-By-Step Construction


The Deck

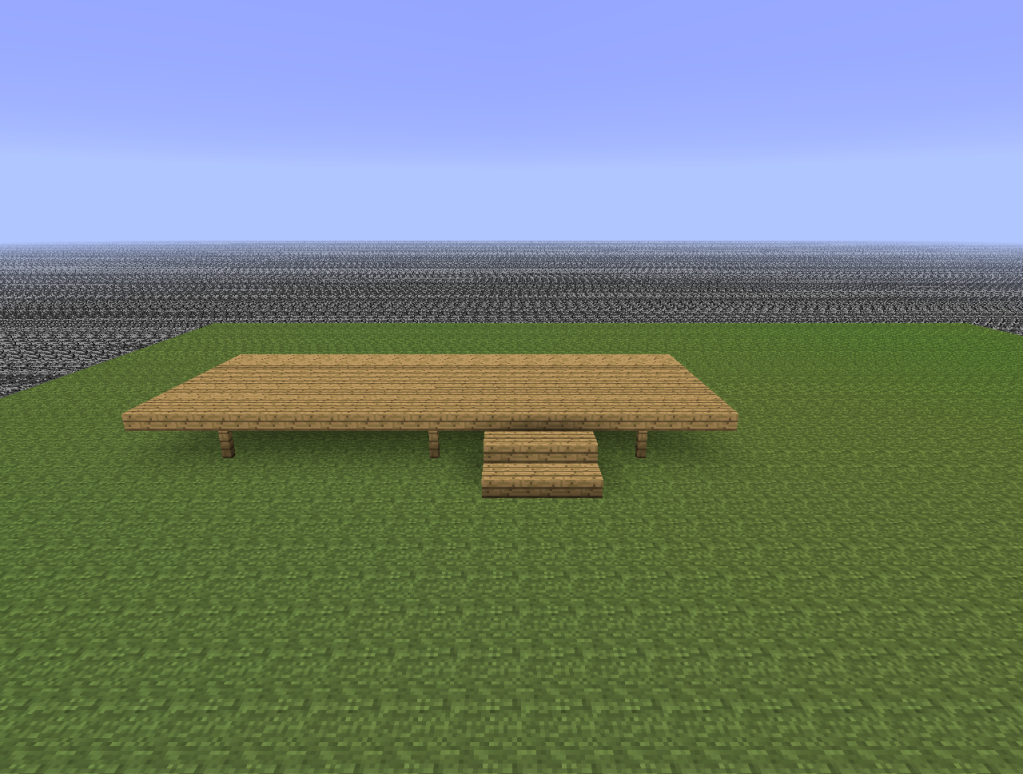
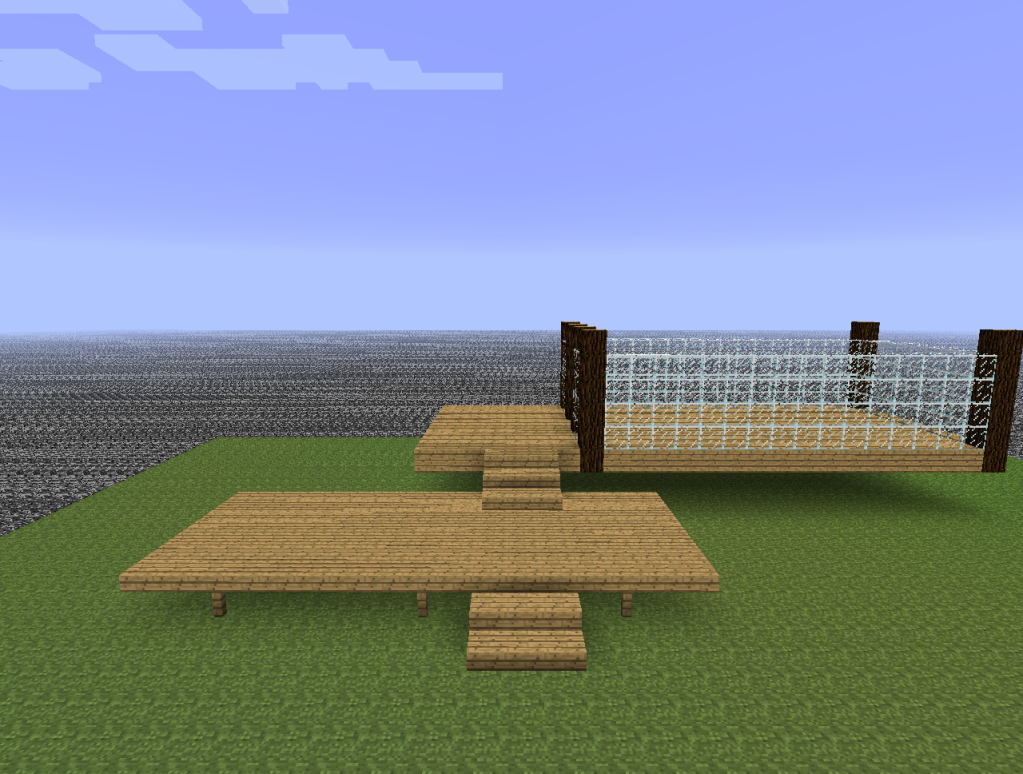
The first step is to make the deck. The deck is raised 1 meter off the ground and made with wooden half-blocks. It is 17x7. The deck is supported by single fence posts, as shown in the picture. The outer posts are under the third block in. The middle fence post is centered between the two with 5 meters of air space on each side. The stairs are made of half blocks, 3 wide, and centered on the right-hand portion of the deck.


Main Floor

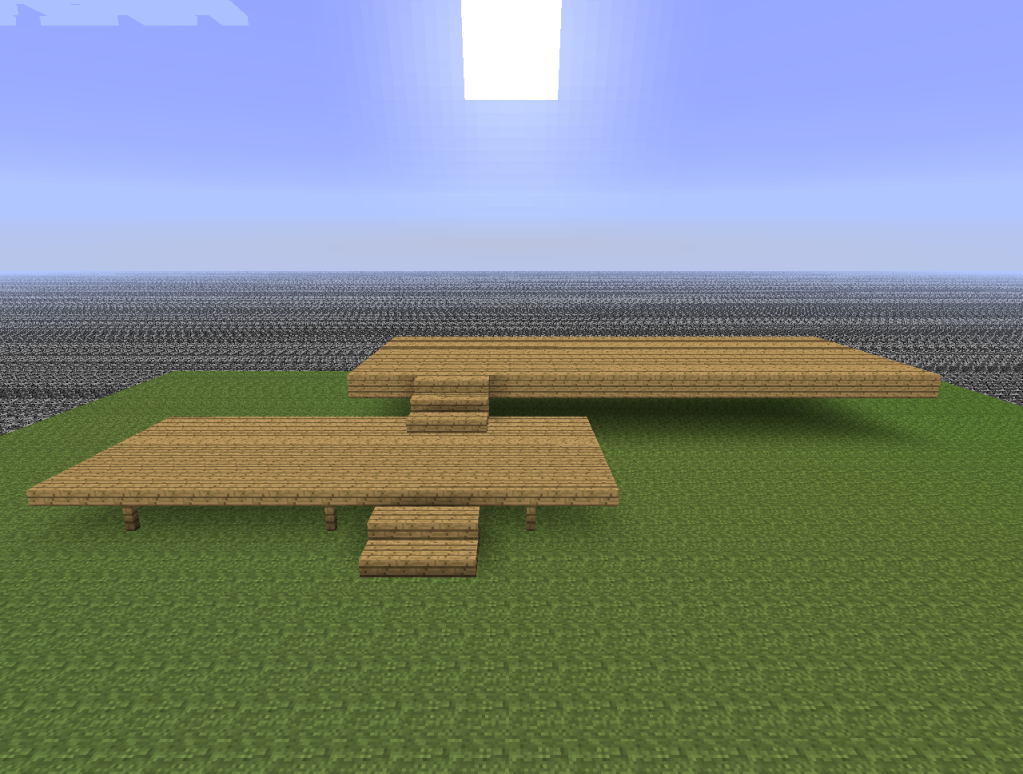
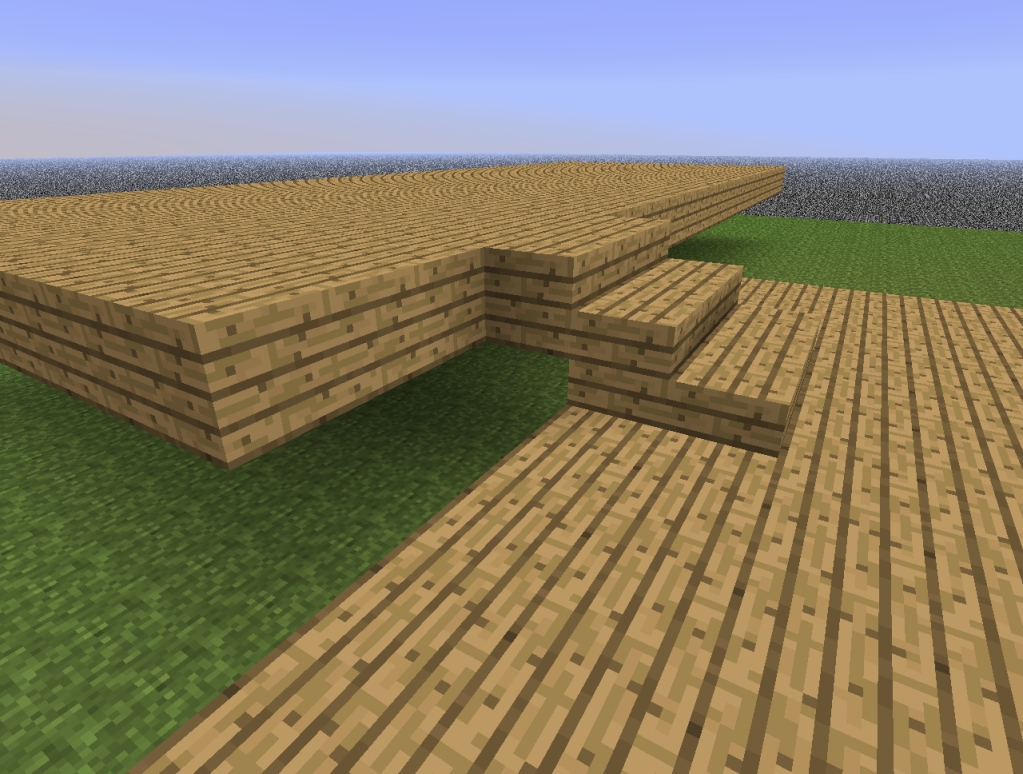
The main floor is made of wooden planks, and has dimensions of 25x10. The deck connects to this floor with a 3-step staircase, directly in line with the first staircase.


Walls

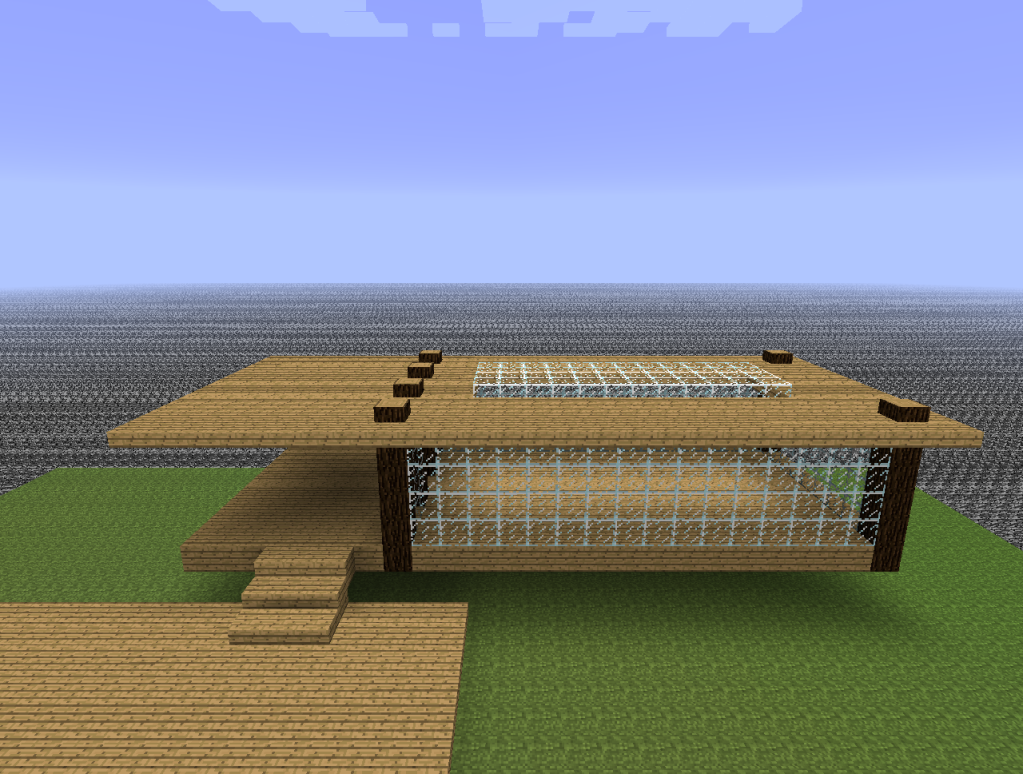
The walls are made extensively from glass, with pine-log pillars. The main floor is divided into two sections, a 7x10 front porch section, and the enclosed house area. The walls are 4 blocks high, plus floor and roof.


Roof

Lastly, the roof is made from wooden half blocks, and extends one meter out from the wall in all directions. I opted to include a skylight in the house portion as well. In the final version I also included fence-pillar supports around the edges of the house, as seen in the first image in this thread.


Alternate Texture

I have created an alternate texture pack for Modern Style. Modern Style is characterized by the use of steel, glass, and concrete.

If interested in this texture pack, please PM me on the forums, or look in my downloads section when it is completed.

Aldaron - Spirit of Avalon Grove

Tree Spirit Challenge

I am Aldaron, a Tree Spirit. I came into this world connected to a young birch sapling, whose name is Telperion. It is a strong tree, full of heart and love. Together, we will grow. Together, we will thrive.


There was a challenge posted on the Minecraft Forums, called the Tree Spirit Challenge. The basic premise is that you start the game, pick a tree, and attach yourself to it. You can never leave your tree, which includes any logs of the same type  you add onto it. The only way to grow your tree is to plant saplings of that species, harvest them, and add them to your tree.

The difficulty comes from space. Need dirt? You need to 'grow' roots of your tree toward dirt where you can collect it. Need minerals? You're going to have to grow your roots deep in the earth, since you can never leave your tree. I play this challenge on hard.


Avalon Grove

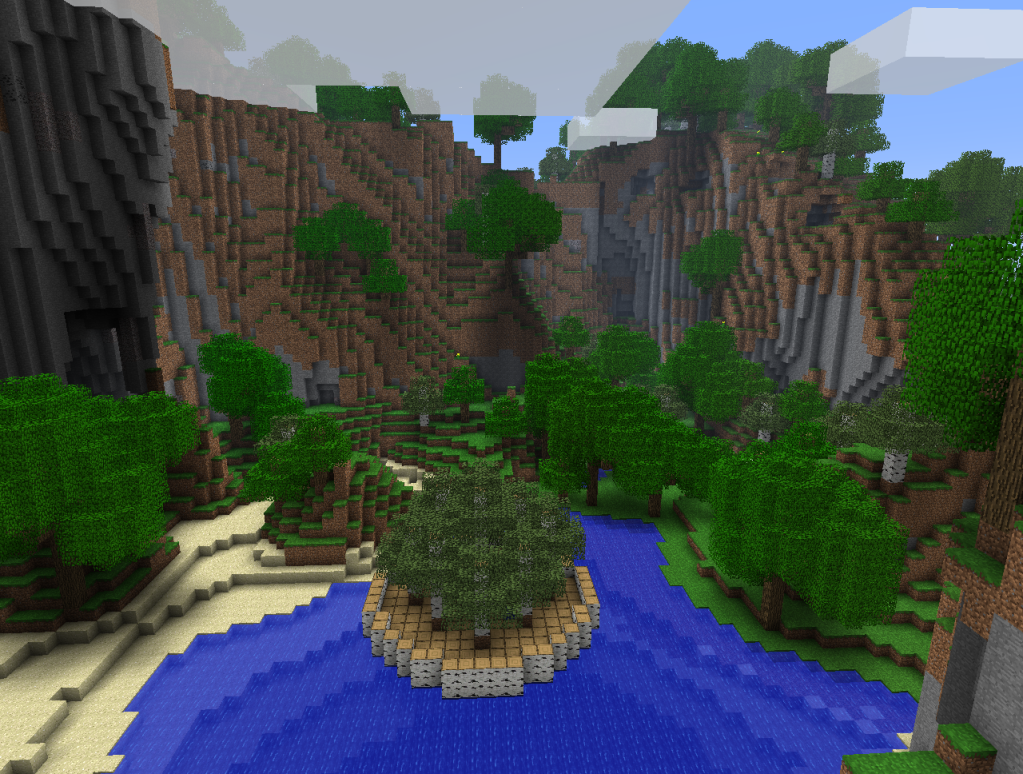
I decided to make my tree in my favorite seed, nicknamed Avalon Grove. Rather than pick an existing tree as my tree, I built my starting tree and went from there. You can see Avalon Grove before I started, and my current progress in the two images below.


Construction

After making my first tree, I built a small dirt wall around it to spend the nights. I was able to kill a few skeletons before my health got too low to continue fighting. I used the bone-meal to grow several trees quickly, and after a few hours I was able to make the floor of the main trunk of my tree. I grow 9 trees at a time, as shown in the picture, for resources.

I now have the floor, with a 1-high wall on the edges. I also expanded down into the sandstone. Clearing the water inside my trunk took me well over an hour, as I was limited in resources. I was only able to use the sand I had under my trunk.

Diamond

Overview:
A Diamond Is Forever. A Girl's Best Friend. Awesome Weapons. Diamonds are sought-after, and often elusive.

Layer Range: 1-19

Sweet Spot Layers: 5-17(Technically) 13-16(Recommended)

Percentages by Layer:
Diamond spawns in it's best layers at 0.09%. It drops off sharply at layers 1-3 and layers 18-19.

Percentages by Quadrant:
NE: 0.07%
NW: 0.09%
SE: 0.09%
SW: 0.13%

Redstone

Overview: Redstone. Creation. Automation. The ore of the engineers. Redstone allows you to create electric circuits.

Total layer range: 1-19

Sweet spot layers: 4-16
Redstone is consistent along these layers.

Percentages by layer: Equal, 0.78%

Percentages by quadrant:
Redstone is also affected by the quadrant bug. The difference between NE and SW is a 58% increase.
NE: 0.63%
NW: 0.78%
SE: 0.78%
SW: 1%

Gold

Overview: Whoever has the gold, makes the rules. Well, this is minecraft, your rules no matter what.

Total layer range: 1-36

Sweet spot layers: 3-30
Gold is another consistently spawning ore across almost its entire range.

Percentages by layer: Equal, 0.11%

Percentages by quadrant:
Gold is affected dramatically by the quadrant glitch. The increase from NE to SW is 65%.
NE: 0.097%
NW: 0.11%
SE: 0.11%
SW: 0.16%

Iron

Overview: Iron is an extremely useful ore, used in making tools, weapons, armor, buckets, compasses, doors, minecart tracks, and flint and steel.

Total layer range: 1-67

Sweet spot layers: 3-40
Equal on all layers. Might as well find it while also finding rarer ores.

Percentages by layer: Equal, 0.55%

Percentages by quadrant:
Iron is greatly affected by the quadrant bug. A 62% increase from NE to SW.
NE: 0.45%
NW: 0.55%
SE: 0.55%
SW: 0.73%

Coal

Overview: Coal is a very common ore that can spawn at any layer. Because of this, almost any type of exploration or mining system will find large amounts of coal by default.

Total layer range: 1-128

Sweet spot layers: 13-16
Equal on all layers. Easiest to find exposed on cliff faces or in caves. Best to find while mining for rarer ores.

Percentages by layer: Equal, 1.1%

Percentages by quadrant:
Coal is the least effected by the quadrant bug. The difference is almost impossible to see on a map render.
NE: 1.0%
NW: 1.1%
SE: 1.1%
SW: 1.2%

Lapis Lazuli


Overview
Lapis Lazuli is a blue gemstone which has been valued for its color for over 6,000 years. It was used as decoration by the Egyptians, Assyrians, and Babylonians, and can be considered a sign of great wealth. Later, in the Middle Ages, it was used as a pigment for paintings.

Layer Range: 1-34

Sweet Spot Layers: 14-22(Good), 17-19(Great), 13-16(Recommended)

Percentages by Layer
Lapis spawns in 0.075% of all stone at layer 18. Every layer above or below this layer, the rate drops off at an average of 0.00441%, reaching 0% at layers 0 and 35. By layers 10 and 26, Lapis is only half as common as layer 18.

Percentages by Quadrant:
NE: 0.060% - 1 in every 1666 blocks. 22.5 Lapis per diamond pickaxe.
NW: 0.075% - 1 in every 1333 blocks. 28.2 Lapis per diamond pickaxe.
SE: 0.075% - 1 in every 1333 blocks. 28.2 Lapis per diamond pickaxe.
SW: 0.090% - 1 in every 1111 blocks. 33.7 Lapis per diamond pickaxe.

Lady Phoenix's Manor


Lady Phoenix's Manor


I'm kinda making this for the Lady Phoenix. She loves the Tomb Raider game series more than anything, and wanted a manor of her own in Minecraft. Still a WIP, I'm putting off adding the wings and fixing the roof for now, doing some landscaping instead.

Sorry, but I suck at fountains.


Split Staircase, there will be one going down as well(not on this map though since I'm at bedrock).

Architecture 101

As I work on architectural/design tutorials, I decided to create a crash course in the process of building. Sometimes, if you get stuck, all it can take is an idea of *what* to work on next, which leads to new ideas, and new ideas. Hopefully, this quick guide will give you an idea on what part of your structure to work on next.

Each topic, such as height, roofs, materials, windows, etc... will be covered in more depth later on. This guide is meant to be demonstrative in principal only.*


*Did that sound like a legal disclaimer to you too? Good, I thought it was just me.

I purposefully chose a boring, cube structure to show these steps. The structure isn't the focus of this guide, the principals behind it are the focus.


Size and Shape

First, you should have some idea of the shape and size of your structure. Sometimes I build the entire building out of one material and work my way from there. Sometimes I have a clearer picture in my mind to work off of. The material I choose is usually the 'main' material I will build with, in this case, planks.


Foundation


Every good building should have a foundation. Even if you might not see the foundation in the finished product, I encourage you to actually build it. You just might like it enough to show it off, or it might help you to make the entire structure more assimilated.


Support


The single most important factor in my designs is how the structure is supported. Beams, pillars, columns, etc... This gives you a chance to introduce internal/external framework, contrasting color/texture, and that extra X factor.


The Roof


The roof can be difficult. I struggle with the roof design often. Usually I will start a few different designs, pick the one I like best, and finish it over the entire structure. Unfortunately, I usually then decide I don't like it and have to tear it down and start over. One simple pattern that usually works well is the alternating half-step, full block roof. A gentle slope, following the contour of the building.


Finishing Touches


The stage which is the most fun for me. This can include adding windows, changing little details, stairs, gardens, fountains, furniture, etc... I usually never reach a point where I think a structure is finished... I might have an idea for an addition in a few days... it's an on-going process.


Fire Science


*Disclaimer: All information in this thread is based off a short series of tests, and it is possible that this information can change. Scientifically, I can only say what I observe happen, I can never truthfully say what can'thappen, although sometimes I do anyway ;)


Spreading


This is the pattern of what blocks a flame can spread to, assuming the flame is on top of a block. The orange block represents the source block(probably netherrack), the torch represents the actual flame, and all the red blocks are in danger of catching fire directly. This means if you have a flammable block in any of those spaces, it can catch fire. The pattern is a 3x3 area up to 6 blocks above the source block and 1 block below, totally 3x3x8. There are also extensions to the pattern from the level of the source block to 5 blocks above, and 3 blocks wide. Another way to think of it is two intersecting areas 3x5x6, with 3x3x1 caps on top and bottom.


One thing I learned in my testing is that not all fires are equal. Some flames will not spread in certain patterns, but punching and replacing them fixes this 'problem'. *NEW* It appears that the problem occurs more often when you place the flammable blocks after you light the fire. I think there is a pattern to when this happens but I'm not sure yet.


Cross-sectional image(below):


Cross-sectional image(above):


Full-pattern


Barriers


Vertical barriers don't prevent fire from spreading, but horizontal barriers do. If the dirt in the image below were air, the fire would spread. I'm still looking into the exact ramifications of this for safe fireplaces, and will update this when I'm sure I have it figured out correctly.


Here is the pattern you can protect. By placing a non-flammable block in one of the black spaces, you protect the adjacent block. You can protect any of the blue blocks shown.


There are black blocks you can't see which are required to protect any given layer. They are shown here.


The protection blocks are independent of each other. The brown blocks are required to protect the blue blocks, and the black blocks are required to protect the yellow blocks, but either is safe without the other.


Lastly, it is important to remember that there is no vertical protection. In a test with a layer of stone above the flames, a layer of water above the stone, a layer of stone above that, and wood on top of that stone, the wood caught fire. The protection each layer gets comes from that layer's black blocks. It might seem a little screwy, but protecting the top layer(that you can protect) comes from placing blocks horizontally inside, even though the flames have direct line of sight to the wood. It's easier to see in this picture. I can only conclude that the fire algorithm first tries to spread vertically before horizonally.


Barrier Material


Now this really surprised me. Obviously things like dirt, stone, etc... work as a barrier. Water also works, whether it is still water, falling water, or the smallest, last block of flowing water. Glass also works, as do fences, torches(!), signs, ladders, and redstone dust. The torches can be placed on the 'ground' between the source block and flammable block, on the source block itself, or on the flammable block... it seems that all it takes is for something to be in that space to prevent spreading.


Fireplaces


This is a minimal design for a safe fireplace, showing a 1-wide and 3-wide variation. The entire fireplace is 8 blocks high, with the netherrack on the 2nd layer. It might be possible to remove some of the blocks, but for simplicity, and for worries about south-west issues, this should suffice.


Lava Science

*Disclaimer: All information in this thread is based off a short series of tests, and it is possible that this information can change. Scientifically, I can only say what I observe happen, I can never truthfully say what can't happen, although sometimes I do anyway ;)


Spreading


This is the pattern of what blocks lava can spread to. The orange block represents a lava block, red blocks are in danger of catching fire. The pattern is 3x3 on the level of the lava, 5x5 on the next two levels, and 5x5 with the corners safe on the top level.

I haven't been able to get lava to spread fire below its own level, but all my tests were with contained lava blocks, still more to come.


Deir el-Jamarn


Deir el-Jamarn: Day 1


Deir el-Jamarn is an Egyptian-style city I am building. The city is located near a valley, similar to the Valley of the Kings. The main purpose of the city is to simply provide housing for the workers, but the nobles who the tombs are being made for live in the city.

I am using the default texture pack with one change. I 'muddied' the sandstone texture so it would look more like mud bricks, and give contrast to the surrounding sand. Additional materials other than sandstone, dirt, and sand, will be rare in this environment.

The low, long buildings outside the wall house the workers for the valley, while the nobility and their servants live inside the wall.

Every block is placed by hand, and I use TooManyItems to give myself the building materials, as this is a creative project. I use MCEdit for the terrain only, such as the flat desert, valleys, and mountains.

Ancient Egyptian Dwellings

The type of dwelling I created is a courtyard/rooftop based design. The living quarters and other rooms are secondary to the outdoor living. The wealthy could have water brought in for pools, vegetation planted, etc. The rooftop is another important area, often for relaxing, eating, etc...

My design is limited in size and space due to my computer, so the exterior landscaping hasn't been done. This is more of an idea than a finished product. However, I wanted to keep the dwelling simple, as this is a representation of an ancient design when luxuries were few and far between. The area also limited building materials greatly.


Survival Style Shelters

Honestly, I don't like to just dig a hole in a cliff every time I start in a new world. So, I decided to try and build survival-style shelters to start, following the natural landscape. I also decided to build my first shelter within view of the spawn. Post your terrain-dependent structures, or discuss your opinion on what a 'starting structure' should look like.

This is what I came up with on my first generated world.

NSEW views:


I decided to level out the small island in the water. This would give me some separation from the dangers of the mainland, and slow down any opposing foes.


I then built a 1 meter high sandwall for further protection.


Lastly, I started to expand for needed materials by mining down. I followed the natural terrain for the walls.